My version of buffalo chicken dip...
2 boneless chicken breasts, diced into small pieces12oz bottle of Frank's Redhot (I put that s#*t on everything!)
Cream cheese
1 cup shredded cheddar cheese
4oz pkg of crumbled blue cheese
My crock pot is in use right now, so I'm trying something a little different with this. I want the chicken to cook slowly and stay moist, so I put it in a pot on the stove on low heat and added the hot sauce. Stir this often! You don't want it to burn. Okay, so this step only took about 45 minutes. So much for slow cooking on the stove top!
Once this has cooked for about an hour, use a slotted spoon to remove the chicken from the sauce and shred using two forks. Set the shredded chicken aside in a bowl as you work. When it's all shredded, put the chicken back in the pot with the hot sauce.I had about 6oz of cream cheese in an 8oz tub, so I added that next. Let the cheese start to melt into the chicken mixture, stirring every five minutes or so.
Once the cream cheese was well incorporated, I decided it needed to be thicker and cheesier, so I added about a cup of shredded cheddar cheese. I turned the heat up to medium and stirred every five minutes until it was all warm and bubbly.
It's hours before game time, so I went ahead and put the dip into a small Pyrex dish. When it cooled I put it in the fridge for a few hours. When you're about a half an hour from serving, top the whole thing with crumbled blue cheese. Heat the oven to 350 degrees. When the oven reaches temp, put the dip in the oven for about 20 minutes. Serve with celery sticks and tortilla chips.
Sunday, February 6, 2011
Crock Pot Ribs
Here's another one that I'm making up as I go...
1/2 a large yellow onion, diced
2-3 racks of pork spare ribs, cut into individual sections (I only have one rack. I didn't really know how much was there because it was given to me, already wrapped and frozen. This will make a nice Superbowl snack,)
Salt and pepper
1 lemon, cut into 8 sections
Apple juice
BBQ sauce
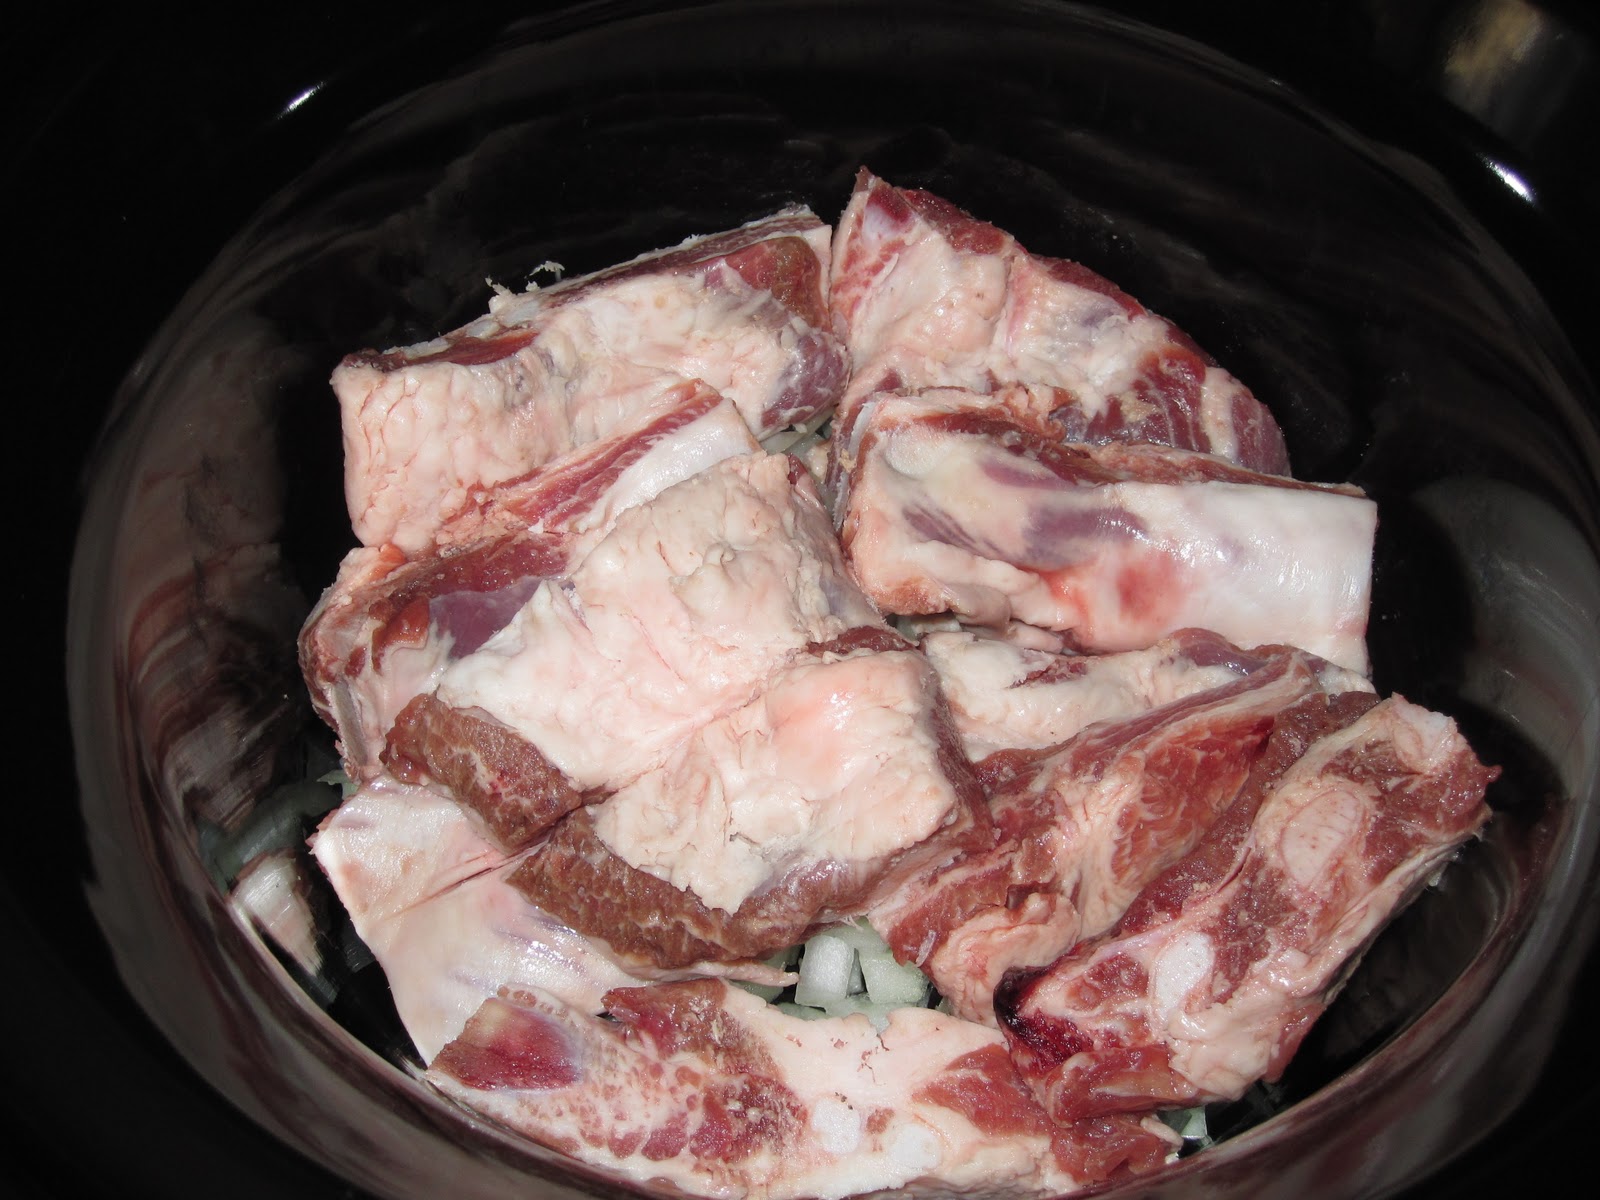
Place diced onion in the bottom of the ceramic insert. Place individual ribs on top of the diced onion. Sprinkle generously with salt and pepper. Add lemon wedges. Cover everything with apple juice and set the cooker on low. Cook on low for eight hours.
When eight hours have past, using a slotted spoon, remove ribs from cooker. Dump liquid, lemons and onions out of the pot. Put the ribs back in the bottom of the pot. Pour on your favorite bbq sauce with about 1/2-1 cup of water. Put back in cooker for about an hour.
And the finished product...
Not even close to staying on the bones.
*Extra tip:
I only used about half the bottle of apple juice, and since I know I won't use the rest before it goes bad, I poured the remaining juice into ice cube trays and froze it for future use. I do this with all kinds of liquids. Wine, stocks and broths, juices. Anything that you know won't get used, but you don't want to waste.
1/2 a large yellow onion, diced
2-3 racks of pork spare ribs, cut into individual sections (I only have one rack. I didn't really know how much was there because it was given to me, already wrapped and frozen. This will make a nice Superbowl snack,)
Salt and pepper
1 lemon, cut into 8 sections
Apple juice
BBQ sauce
Place diced onion in the bottom of the ceramic insert. Place individual ribs on top of the diced onion. Sprinkle generously with salt and pepper. Add lemon wedges. Cover everything with apple juice and set the cooker on low. Cook on low for eight hours.
When eight hours have past, using a slotted spoon, remove ribs from cooker. Dump liquid, lemons and onions out of the pot. Put the ribs back in the bottom of the pot. Pour on your favorite bbq sauce with about 1/2-1 cup of water. Put back in cooker for about an hour.
And the finished product...
Not even close to staying on the bones.
*Extra tip:
I only used about half the bottle of apple juice, and since I know I won't use the rest before it goes bad, I poured the remaining juice into ice cube trays and froze it for future use. I do this with all kinds of liquids. Wine, stocks and broths, juices. Anything that you know won't get used, but you don't want to waste.
Thursday, February 3, 2011
Shredded Beef Tacos in the Crock Pot
I love my crock pot! It's so nice to toss everything in in the morning and come home to dinner! I made this on Tuesday and it was so good!
3lb brisket, cut into several pieces
half a large yellow onion, diced
1 cup water
taco seasoning (I made my own! The recipe is at the end.)
1 small can of diced green chilies
taco shells or tortillas
lettuce, shredded
tomatoes, diced
red onion, diced
shredded cheese
sour cream
taco sauce
cholula or your favorite hot sauce
I started by dicing half a yellow onion. I put half of the diced onion in the bottom of the crock pot, put the meat on top of it, then put the rest of the onion on top of the meat. I dumped in the can of diced green chilies, then mixed the taco seasoning with the cup of water and put that in. I turned my crock pot on to low, then I went to work! The meat was frozen and too large to fit in the crock pot as it was, so I chopped it into five smaller pieces and shoved it in.
When I got home the whole house smelled great, and this is what the meat looked like...
I turned the crock to warm, and started chopping the lettuce, tomato and red onion for serving. When I was done with that, I started shredding the beef. There was a big sheet of fat on one side of the meat, so as I took each piece out of the pot to shred, I scraped the fat off and discarded it...
That's the fat on the left of the pic. Gross!
As I shredded each hunk of beef, I placed it in another pan on the stove to keep it all warm...
I also spooned the liquid over the beef to keep it moist.
I warmed up some hard taco shells in the oven and served the meat and shells with an assortment of toppings...
Here's the finished product...
And my dad chose to make a taco salad...
These were a little harder to eat than regular ground beef tacos. The meat tended to pull out of the bottom of the shell as we ate them, but they were so yummy! I think next time I need to cut the brisket into smaller hunks before I start cooking it. I also think it needed a bit more chili powder in the seasoning.
There was some leftover meat, so I'm going to freeze it and use it for enchiladas or burritos some time soon.
Taco seasoning recipe:
3lb brisket, cut into several pieces
half a large yellow onion, diced
1 cup water
taco seasoning (I made my own! The recipe is at the end.)
1 small can of diced green chilies
taco shells or tortillas
lettuce, shredded
tomatoes, diced
red onion, diced
shredded cheese
sour cream
taco sauce
cholula or your favorite hot sauce
I started by dicing half a yellow onion. I put half of the diced onion in the bottom of the crock pot, put the meat on top of it, then put the rest of the onion on top of the meat. I dumped in the can of diced green chilies, then mixed the taco seasoning with the cup of water and put that in. I turned my crock pot on to low, then I went to work! The meat was frozen and too large to fit in the crock pot as it was, so I chopped it into five smaller pieces and shoved it in.
When I got home the whole house smelled great, and this is what the meat looked like...
I turned the crock to warm, and started chopping the lettuce, tomato and red onion for serving. When I was done with that, I started shredding the beef. There was a big sheet of fat on one side of the meat, so as I took each piece out of the pot to shred, I scraped the fat off and discarded it...
That's the fat on the left of the pic. Gross!
As I shredded each hunk of beef, I placed it in another pan on the stove to keep it all warm...
I also spooned the liquid over the beef to keep it moist.
I warmed up some hard taco shells in the oven and served the meat and shells with an assortment of toppings...
Here's the finished product...
And my dad chose to make a taco salad...
These were a little harder to eat than regular ground beef tacos. The meat tended to pull out of the bottom of the shell as we ate them, but they were so yummy! I think next time I need to cut the brisket into smaller hunks before I start cooking it. I also think it needed a bit more chili powder in the seasoning.
There was some leftover meat, so I'm going to freeze it and use it for enchiladas or burritos some time soon.
Taco seasoning recipe:
- 1 tablespoon chili powder
- 1/4 teaspoon garlic powder
- 1/4 teaspoon onion powder
- 1/4 teaspoon crushed red pepper flakes
- 1/4 teaspoon dried oregano
- 1/2 teaspoon paprika
- 1 teaspoon ground cumin
- 1 teaspoon sea salt
- 1 teaspoon black pepper
Braised Pork Chops with Mushrooms, Shallots and Garlic
This is something I came up with based on my Braised Chicken and Mushrooms recipe. It's really just about the same thing, but with pork chops and the addition of shallots.
3-4 boneless pork chops
1 lg shallot, diced
8 cloves of garlic, minced
1 lb sliced mushrooms
2 cups chicken broth
1/2 cup (ish) of dry white wine
olive oil
salt and pepper
Sprinkle one side of pork chops with salt and pepper. Get a regular pan nice and hot, about medium on your dial. (Not non-stick) Put about 2 tbsp of olive oil in pan. When it's hot, put pork chops, salt and pepper side down into pan. Move them around a little to make sure they don't stick. Sprinkle the exposed side with salt and pepper. Don't fully cook the chops. You just want a nice golden brown color on each side. Set chops aside on a plate when both sides are nicely browned.
Add mushrooms to the pan and cook until the juices release. Scrape any meat that's stuck to the bottom of the pan to incorporate it into the sauce. When the mushrooms release their juices add the garlic and shallots. (When I prep stuff in advance I always put a little olive oil in with the garlic so it doesn't stick to the cup) Once the garlic and shallots soften add the wine.
When the wine cooks off a bit add a cup of the broth, then put the chops back in the pan with any juices from the plate. Raise the heat to medium-high. Turn the chops every five minutes. Add the rest of the broth when it cooks down some. Continue cooking until a nice sauce forms and the chops are fully cooked. Serve! :)
3-4 boneless pork chops
1 lg shallot, diced
8 cloves of garlic, minced
1 lb sliced mushrooms
2 cups chicken broth
1/2 cup (ish) of dry white wine
olive oil
salt and pepper
Sprinkle one side of pork chops with salt and pepper. Get a regular pan nice and hot, about medium on your dial. (Not non-stick) Put about 2 tbsp of olive oil in pan. When it's hot, put pork chops, salt and pepper side down into pan. Move them around a little to make sure they don't stick. Sprinkle the exposed side with salt and pepper. Don't fully cook the chops. You just want a nice golden brown color on each side. Set chops aside on a plate when both sides are nicely browned.
Add mushrooms to the pan and cook until the juices release. Scrape any meat that's stuck to the bottom of the pan to incorporate it into the sauce. When the mushrooms release their juices add the garlic and shallots. (When I prep stuff in advance I always put a little olive oil in with the garlic so it doesn't stick to the cup) Once the garlic and shallots soften add the wine.
When the wine cooks off a bit add a cup of the broth, then put the chops back in the pan with any juices from the plate. Raise the heat to medium-high. Turn the chops every five minutes. Add the rest of the broth when it cooks down some. Continue cooking until a nice sauce forms and the chops are fully cooked. Serve! :)
Thursday, January 20, 2011
Chicken Enchiladas
I'm so happy to be posting regularly again! Tonight I'm making chicken enchiladas. I've never done this before, and I'm writing as I go, so I really hope it turns out well.
First, I started this morning by making my salsa chicken in the crock pot. I put four frozen chicken breasts in the bottom and I topped it with a 15.5 oz jar of Tostitos brand salsa. I left for work before I actually wanted to start the crock pot, but I'm lucky that I always have someone home. I called home around 10:30 and asked my hubby (Telework day) to start the crock pot on low. When I got home at 5, it was ready to shred. If you don't have the luxury of a hubby who teleworks, or a Dad that lives with you and is home all day, no problem! Just go to the hardware store and buy an automatic timer. Set this up with the crock pot, and use frozen meat, and you're good to go. You can leave frozen meat in the crock, on the counter, and it'll just start to defrost a bit before the timer starts the cooking. I wouldn't do this with thawed meat. I'm too weird about food going bad.
Anyway, now that my chicken is ready, I'm going to make Rice-a Roni Spanish rice, using fresh tomatoes, not canned, and heat a can of black beans to serve with the enchiladas. Once I have the rice started I'll start putting them together...
Okay, Rice is working so it's time to start putting together the enchiladas. First, spray a 9x13ish Pyrex dish with cooking spray for easier clean up. I'm using corn tortillas, but flour torts would work too. I just had the corn torts from a previous meal. Pre-heat the oven to 350.
Okay, scratch that. USE FLOUR TORTS!!!! The corn torts are breaking and popping open. Lucky for me, I married an awesome man who is going to go buy flour torts on the fly! I really hope they work better, or we're just having the chicken with rice and beans.
So, I'm facebooking while doing this, and getting some great suggestions. Hubby is on his way home with flour torts, and I really think this is my most comical post to date. :)
Okay, back to work! The flour torts seem to be much better suited to this project. So, fill the torts with some of the chicken and roll them up. Place them into the Pyrex dish. When you've filled the dish, top the whole thing with a small can of Old El Paso brand mild enchilada sauce, then top that with about 2 cups of shredded cheddar. Put this in the oven for about 10 minutes to warm and melt everything. Serve with the rice and beans!
And the whole meal...
It tastes really yummy, but Hubby and I agree that it needs more sauce. Bring on the Chalula!!!
Delish! Too bad this is way too much food. Lucky for me, I had a hungry neighbor who also thinks it's yummy. Or she's lying just to make me feel good. I'm okay with it either way. I will make this again!
First, I started this morning by making my salsa chicken in the crock pot. I put four frozen chicken breasts in the bottom and I topped it with a 15.5 oz jar of Tostitos brand salsa. I left for work before I actually wanted to start the crock pot, but I'm lucky that I always have someone home. I called home around 10:30 and asked my hubby (Telework day) to start the crock pot on low. When I got home at 5, it was ready to shred. If you don't have the luxury of a hubby who teleworks, or a Dad that lives with you and is home all day, no problem! Just go to the hardware store and buy an automatic timer. Set this up with the crock pot, and use frozen meat, and you're good to go. You can leave frozen meat in the crock, on the counter, and it'll just start to defrost a bit before the timer starts the cooking. I wouldn't do this with thawed meat. I'm too weird about food going bad.
Anyway, now that my chicken is ready, I'm going to make Rice-a Roni Spanish rice, using fresh tomatoes, not canned, and heat a can of black beans to serve with the enchiladas. Once I have the rice started I'll start putting them together...
Okay, Rice is working so it's time to start putting together the enchiladas. First, spray a 9x13ish Pyrex dish with cooking spray for easier clean up. I'm using corn tortillas, but flour torts would work too. I just had the corn torts from a previous meal. Pre-heat the oven to 350.
Okay, scratch that. USE FLOUR TORTS!!!! The corn torts are breaking and popping open. Lucky for me, I married an awesome man who is going to go buy flour torts on the fly! I really hope they work better, or we're just having the chicken with rice and beans.
So, I'm facebooking while doing this, and getting some great suggestions. Hubby is on his way home with flour torts, and I really think this is my most comical post to date. :)
Okay, back to work! The flour torts seem to be much better suited to this project. So, fill the torts with some of the chicken and roll them up. Place them into the Pyrex dish. When you've filled the dish, top the whole thing with a small can of Old El Paso brand mild enchilada sauce, then top that with about 2 cups of shredded cheddar. Put this in the oven for about 10 minutes to warm and melt everything. Serve with the rice and beans!
And the whole meal...
It tastes really yummy, but Hubby and I agree that it needs more sauce. Bring on the Chalula!!!
Delish! Too bad this is way too much food. Lucky for me, I had a hungry neighbor who also thinks it's yummy. Or she's lying just to make me feel good. I'm okay with it either way. I will make this again!
Wednesday, January 19, 2011
Beef, Mushroom and Barley Soup
Mmmmm! This soup is so yummy! It really warms you from the inside out, and it's filling!
2 cups of barley (I use the regular kind that you have to boil for a while)
2 lbs of beef chunks
2 shallots, minced
8 cloves garlic, minced
1 lb cleaned, sliced mushrooms
two 32 oz cartons of beef broth
olive oil
1/4 cup dried parsley
Follow the directions on the bag of barley for cooking. Mine basically said to add 8 cups of water and boil for 45 minutes to an hour to soak up all the water.
While the barley is doing it's thing, cut up the beef chunks. I usually buy beef chunks at the store, but then I like to cut them up smaller for this soup. I also take that time to cut out any really big hunks of fat. Saute the beef in about 1 tbsp of olive oil.
While the beef and barley are cooking, mince the shallots and garlic.
So, my barley wasn't done and the water was almost gone. I added both cartons of beef broth to it and brought it back to a boil. Drain the fat from the meat when it's done cooking and add the meat to the barley. Add 2 tbsp of olive oil to the pan the beef was in. When that heats up, add the shallots and garlic. Stir often. You don't want this to burn, just cook until softened. When the garlic and shallots are soft, add them to the barley and meat. Add dried parsley.
Brown the mushrooms in the same pan, working in batches so you don't over crowd them. I think it was Julia Child who said "Don't crowd the mushrooms". They just won't brown if you over crowd them. Also add more olive oil if you need it. When each batch of mushrooms is ready, add it to the pot of soup.
Let everything simmer for about a half an hour, then serve with some bread. I always have leftovers, which freeze and re-heat well. I also added fresh ground pepper to everything that went into the saute pan. I didn't use salt because my hubby and I are both pre-hypertensive and I used regular beef broth instead of low sodium. If you need more salt, add it.
2 cups of barley (I use the regular kind that you have to boil for a while)
2 lbs of beef chunks
2 shallots, minced
8 cloves garlic, minced
1 lb cleaned, sliced mushrooms
two 32 oz cartons of beef broth
olive oil
1/4 cup dried parsley
Follow the directions on the bag of barley for cooking. Mine basically said to add 8 cups of water and boil for 45 minutes to an hour to soak up all the water.
While the barley is doing it's thing, cut up the beef chunks. I usually buy beef chunks at the store, but then I like to cut them up smaller for this soup. I also take that time to cut out any really big hunks of fat. Saute the beef in about 1 tbsp of olive oil.
While the beef and barley are cooking, mince the shallots and garlic.
So, my barley wasn't done and the water was almost gone. I added both cartons of beef broth to it and brought it back to a boil. Drain the fat from the meat when it's done cooking and add the meat to the barley. Add 2 tbsp of olive oil to the pan the beef was in. When that heats up, add the shallots and garlic. Stir often. You don't want this to burn, just cook until softened. When the garlic and shallots are soft, add them to the barley and meat. Add dried parsley.
Brown the mushrooms in the same pan, working in batches so you don't over crowd them. I think it was Julia Child who said "Don't crowd the mushrooms". They just won't brown if you over crowd them. Also add more olive oil if you need it. When each batch of mushrooms is ready, add it to the pot of soup.
Let everything simmer for about a half an hour, then serve with some bread. I always have leftovers, which freeze and re-heat well. I also added fresh ground pepper to everything that went into the saute pan. I didn't use salt because my hubby and I are both pre-hypertensive and I used regular beef broth instead of low sodium. If you need more salt, add it.
Wednesday, January 12, 2011
Stuffed Peppers
Well, Hello there! I know, it's been way too long since my last post. I suck. Anyway, here's a new recipe for you...
Please keep in mind that I'm writing this as I cook, and I've never made this before, nor do I have a recipe. I'm winging it!
You will need...
8 bell peppers
1 lb of lean ground beef, I prefer 93% lean
1 cup of white rice
2 cups of diced plum tomatoes
1 cup of diced red onion
8 cloves of minced, fresh garlic
2 tbsp of butter
8 oz cleaned, sliced button mushrooms
2 cups water
3 tbsp olive oil
1 tbsp dried parsley
1 cup freshly grated Parmesan cheese
Salt and pepper to taste
In a large skillet, brown the meat, breaking it up into small chunks. When it's ready, drain the fat and set meat aside in a medium sized bowl. In the same skillet, add 1 tbsp of olive oil. Heat over medium heat. When the oil is hot, add the diced red onion and garlic. Saute until just starting to soften, about 3-5 minutes. Put the onions and garlic in the bowl with the meat, then add 2 tbsp olive oil to the same pan. When it's heated up, add the mushroom and saute until slightly browned. About 5-7 minutes. Add the mushrooms to the meat, onions and garlic. Add parsley and Parmesan cheese. Stir well.
While meat is browning and onions and garlic, etc are cooking, in a large pot, melt butter over medium heat. When butter is melted, add rice, stirring often, to lightly brown. When the rice is ready, add water and tomatoes. Bring to a boil, then reduce heat to low and cover for 20 minutes. When the rice is done cooking, add the meat mixture and stir well.
While you're doing all of that, pre-heat the oven to 350. Slice the tops off of the bell peppers. Remove and discard the seeds and ribs. Get a large pot of water boiling.When the water is boiling, add peppers. Cook for 5 minutes, then quickly remove them from the boiling water. Place peppers in a casserole dish and fill with meat/rice mixture. Top with additional cheese if desired. I happened to have about 1 cup of mozzarella in my fridge, so I used that. Cook in the oven for 15 minutes, then serve!
Okay, so I only actually used 5 bell peppers, so I froze the remaining filling. Hopefully I'll think of a clever way to use it. I figured 5 peppers would be enough for my small family of 3. I hope you enjoy!
Please keep in mind that I'm writing this as I cook, and I've never made this before, nor do I have a recipe. I'm winging it!
You will need...
8 bell peppers
1 lb of lean ground beef, I prefer 93% lean
1 cup of white rice
2 cups of diced plum tomatoes
1 cup of diced red onion
8 cloves of minced, fresh garlic
2 tbsp of butter
8 oz cleaned, sliced button mushrooms
2 cups water
3 tbsp olive oil
1 tbsp dried parsley
1 cup freshly grated Parmesan cheese
Salt and pepper to taste
In a large skillet, brown the meat, breaking it up into small chunks. When it's ready, drain the fat and set meat aside in a medium sized bowl. In the same skillet, add 1 tbsp of olive oil. Heat over medium heat. When the oil is hot, add the diced red onion and garlic. Saute until just starting to soften, about 3-5 minutes. Put the onions and garlic in the bowl with the meat, then add 2 tbsp olive oil to the same pan. When it's heated up, add the mushroom and saute until slightly browned. About 5-7 minutes. Add the mushrooms to the meat, onions and garlic. Add parsley and Parmesan cheese. Stir well.
While meat is browning and onions and garlic, etc are cooking, in a large pot, melt butter over medium heat. When butter is melted, add rice, stirring often, to lightly brown. When the rice is ready, add water and tomatoes. Bring to a boil, then reduce heat to low and cover for 20 minutes. When the rice is done cooking, add the meat mixture and stir well.
While you're doing all of that, pre-heat the oven to 350. Slice the tops off of the bell peppers. Remove and discard the seeds and ribs. Get a large pot of water boiling.When the water is boiling, add peppers. Cook for 5 minutes, then quickly remove them from the boiling water. Place peppers in a casserole dish and fill with meat/rice mixture. Top with additional cheese if desired. I happened to have about 1 cup of mozzarella in my fridge, so I used that. Cook in the oven for 15 minutes, then serve!
Okay, so I only actually used 5 bell peppers, so I froze the remaining filling. Hopefully I'll think of a clever way to use it. I figured 5 peppers would be enough for my small family of 3. I hope you enjoy!
Sunday, September 12, 2010
Peanut Butter Banana Bread
I always have left over bananas that go bad before we can eat them so I finally decided to start doing something with these over-ripe bananas. I started going through banana bread recipes on line and I found one for peanut butter banana bread. Sounds yummy to me! The only thing I omitted was the walnuts because hubby can't eat them. Here's the link...http://allrecipes.com/Recipe/Banana-Peanut-Butter-Bread/Detail.aspx.
So her's the finished product. Looks good, smells good, tastes? Well, kind of bland. I think it needs more peanut butter and more bananas. Maybe even more sugar. I'll make it again soon and tweak it a bit. I'll re-post it when I get it right.
Bulgogi
Bulgogi is a Korean beef dish that my hubby made once before and I've been craving all week. I couldn't find the recipe he used so I went to allrecipes.com and put bulgogi/Korean beef in the search box. It brought up several recipes, so I pretty much took what I wanted from each. Again, measurements are approximate as I was really just tossing in some of this and some of that.
beef flank steak (Some recipes called for another type of steak. I like flank, so this is what I'm using.)
1/2 cup soy sauce (I use reduced sodium and can never taste the difference)
2 tbsp sesame oil
1/2 tbsp sriracha hot chili sauce
almost a whole bulb of minced garlic. (I do love me some garlic!)
1 bunch of scallions, chopped, just the green parts
2 tbsp sugar
1/2 tsp fresh ground black pepper
A few of the recipes called for rice wine, which I do not have, but since I'm drinking mimosas as I prep the food, I figure a little champagne might work instead. I know that it's totally different, but I improvised.
All of the recipes I found also called for sesame seeds, but my hubby can't have seeds, so I'll just sprinkle them on mine after it's cooked.
Mix everything except the beef together in a small bowl. Thinly slice the beef, against the grain, into strips. Put the beef in a shallow container or a large ziplock plastic bag. Pour the marinade over the beef. I let this marinate for about 3 hours, but you could really let it go overnight, or as little as one hour.
This smelled so yummy even though it was raw!
When I was ready to cook, I fired up the grill and when I had the temp holding steady at 350, I put the beef in a grill basket/skillet and let it cook for about 4 minutes, then I turned it and let it cook for another 4 minutes. Cook it to your desired level of doneness. (Is that a word? You know what I mean, right?)
When the beef was ready, I served it with fried dumplings that I bought in the frozen food section at H-Mart and sticky white rice. I had also read that bulgogi was sometimes served with lettuce leaves to wrap the meat and rice in, so I had green leaf lettuce to go with it. I made a sauce from soy sauce, honey, minced garlic, scallions, sesame seed oil, crushed red pepper flakes and a tiny bit of sriracha.
I let it all simmer for a while and whisked it frequently.
When we were all seated at the table, I asked Dad if it was anything like the bulgogi he remembered from Korea. Without hesitation, he said "No, but it's tasty!". I guess we'll have to go to a Korean restaurant some time soon so I can get a feel for what it's really supposed to taste/look like, but in the meantime, this was really tasty!
If anyone out there has a recipe for something a bit more authentic, I'd love to try it! Please send me a link!
Happy eating!
beef flank steak (Some recipes called for another type of steak. I like flank, so this is what I'm using.)
1/2 cup soy sauce (I use reduced sodium and can never taste the difference)
2 tbsp sesame oil
1/2 tbsp sriracha hot chili sauce
almost a whole bulb of minced garlic. (I do love me some garlic!)
1 bunch of scallions, chopped, just the green parts
2 tbsp sugar
1/2 tsp fresh ground black pepper
A few of the recipes called for rice wine, which I do not have, but since I'm drinking mimosas as I prep the food, I figure a little champagne might work instead. I know that it's totally different, but I improvised.
All of the recipes I found also called for sesame seeds, but my hubby can't have seeds, so I'll just sprinkle them on mine after it's cooked.
Mix everything except the beef together in a small bowl. Thinly slice the beef, against the grain, into strips. Put the beef in a shallow container or a large ziplock plastic bag. Pour the marinade over the beef. I let this marinate for about 3 hours, but you could really let it go overnight, or as little as one hour.
This smelled so yummy even though it was raw!
When I was ready to cook, I fired up the grill and when I had the temp holding steady at 350, I put the beef in a grill basket/skillet and let it cook for about 4 minutes, then I turned it and let it cook for another 4 minutes. Cook it to your desired level of doneness. (Is that a word? You know what I mean, right?)
When the beef was ready, I served it with fried dumplings that I bought in the frozen food section at H-Mart and sticky white rice. I had also read that bulgogi was sometimes served with lettuce leaves to wrap the meat and rice in, so I had green leaf lettuce to go with it. I made a sauce from soy sauce, honey, minced garlic, scallions, sesame seed oil, crushed red pepper flakes and a tiny bit of sriracha.
I let it all simmer for a while and whisked it frequently.
When we were all seated at the table, I asked Dad if it was anything like the bulgogi he remembered from Korea. Without hesitation, he said "No, but it's tasty!". I guess we'll have to go to a Korean restaurant some time soon so I can get a feel for what it's really supposed to taste/look like, but in the meantime, this was really tasty!
If anyone out there has a recipe for something a bit more authentic, I'd love to try it! Please send me a link!
Happy eating!
New Fridge!!!
I never thought I would become domesticated enough to get excited over a major appliance, but I totally am! We finally decided it was time to replace the harvest gold, side-by-side, circa 1972 fridge. I really had my heart set on a bottom freezer with french doors on top. Our new-ish dish washer and stove/oven are black, so I decided to get a black fridge to match, plus stainless is way expensive just for a different look. I found a really nice Maytag on sale at Homedepot.com for just under a grand, then I called around and found out that Sears has a price match guarantee. They match the price, plus give you ten percent off the difference. Pretty good deal!
Now, my existing fridge, in addition to being ancient and ugly, was kind of small, and I really wanted something much bigger. This new one wasn't going to fit, so I called my wonderful contractor, Kenny Smith, of KPS Contracting (410-313-9996, tell him you heard about him from me!) to come remove some cabinets. Kenny came over and in no time at all he removed the cabinet over the fridge (Who really uses that anyway?) and a little one on the side that was only good for broom storage.
Now I was finally ready to go buy my new dream fridge! I get to the store, show the salesman the Home Depot sale price, get set on what I'm going to pay, and as I'm about to hand over my bank card, I think "Wait! I forgot to measure my front door!" I live in an old house with narrow doors and no sliding glass door in the back. I quickly called my dad and asked him to measure the door. 33 inches. Shit! This new fridge is like 38 inches on the smallest side! The salesman says the top doors can be taken off, but nothing can be done about the freezer door. I'm SOL! As I leave the store the tears begin and my hubby suggests we go to the bar. I have a great hubby!
The next day I'm still heartbroken about this fridge. I start looking on line at the ones that will fit through the door and I realize that they also would've fit in the space with out me paying Kenny to come F up my walls by pulling out cabinets! (Not his fault! Totally mine! I knew that the wall was going to be a mess, and I really should have checked the measurements first. I'm going to have him fix up the wall as soon as I save up the money.)
Still not satisfied, I go to Home Depot on my way home from work. I made the saleswomen pull the fridge out from the wall and measure it without the doors. It'll fit! Plus, she says they can take the freezer door off too! Bingo baby! I go home and hubby orders my new fridge. The guys who delivered it were great and I'm happy. Here are some pics...
I love the deli drawer!
And a bottom freezer! No more bricks of frozen food falling out and breaking my feet when the land!
Now, my existing fridge, in addition to being ancient and ugly, was kind of small, and I really wanted something much bigger. This new one wasn't going to fit, so I called my wonderful contractor, Kenny Smith, of KPS Contracting (410-313-9996, tell him you heard about him from me!) to come remove some cabinets. Kenny came over and in no time at all he removed the cabinet over the fridge (Who really uses that anyway?) and a little one on the side that was only good for broom storage.
Now I was finally ready to go buy my new dream fridge! I get to the store, show the salesman the Home Depot sale price, get set on what I'm going to pay, and as I'm about to hand over my bank card, I think "Wait! I forgot to measure my front door!" I live in an old house with narrow doors and no sliding glass door in the back. I quickly called my dad and asked him to measure the door. 33 inches. Shit! This new fridge is like 38 inches on the smallest side! The salesman says the top doors can be taken off, but nothing can be done about the freezer door. I'm SOL! As I leave the store the tears begin and my hubby suggests we go to the bar. I have a great hubby!
The next day I'm still heartbroken about this fridge. I start looking on line at the ones that will fit through the door and I realize that they also would've fit in the space with out me paying Kenny to come F up my walls by pulling out cabinets! (Not his fault! Totally mine! I knew that the wall was going to be a mess, and I really should have checked the measurements first. I'm going to have him fix up the wall as soon as I save up the money.)
Still not satisfied, I go to Home Depot on my way home from work. I made the saleswomen pull the fridge out from the wall and measure it without the doors. It'll fit! Plus, she says they can take the freezer door off too! Bingo baby! I go home and hubby orders my new fridge. The guys who delivered it were great and I'm happy. Here are some pics...
I love the deli drawer!
And a bottom freezer! No more bricks of frozen food falling out and breaking my feet when the land!
Subscribe to:
Posts (Atom)